ChatGPT in Microsoft Teams
It goes without saying that the talk of the town is the recently released ChatGPT of OpenAI. Despite the recent large investment from Microsoft, we imagine it will take a while to implement the fully-fledged functionality across their product suite. However, in about an hour of combined research and implementation we devised a solution to implement the completions functionality of their most powerful GPT-3 model, text-davinci-003, as a chatbot available through our Microsoft Teams instance using the OpenAI API (application programming interface).
Getting Started
There are a couple of things that you'll need to get started on this project. The first is obviously Microsoft Teams, second is Power Virtual Agents and Power Automate, and lastly would be an OpenAI account capable of generating API keys.
Generating an API Key
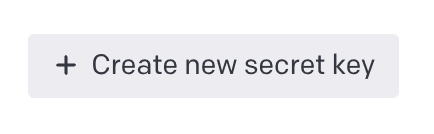
Log into your OpenAI account, click on the organization or profile listed in the navigation ribbon, and click on View API keys. From there, you can just click Create new secret key and copy your newly generated key.
Creating a New Virtual Agent
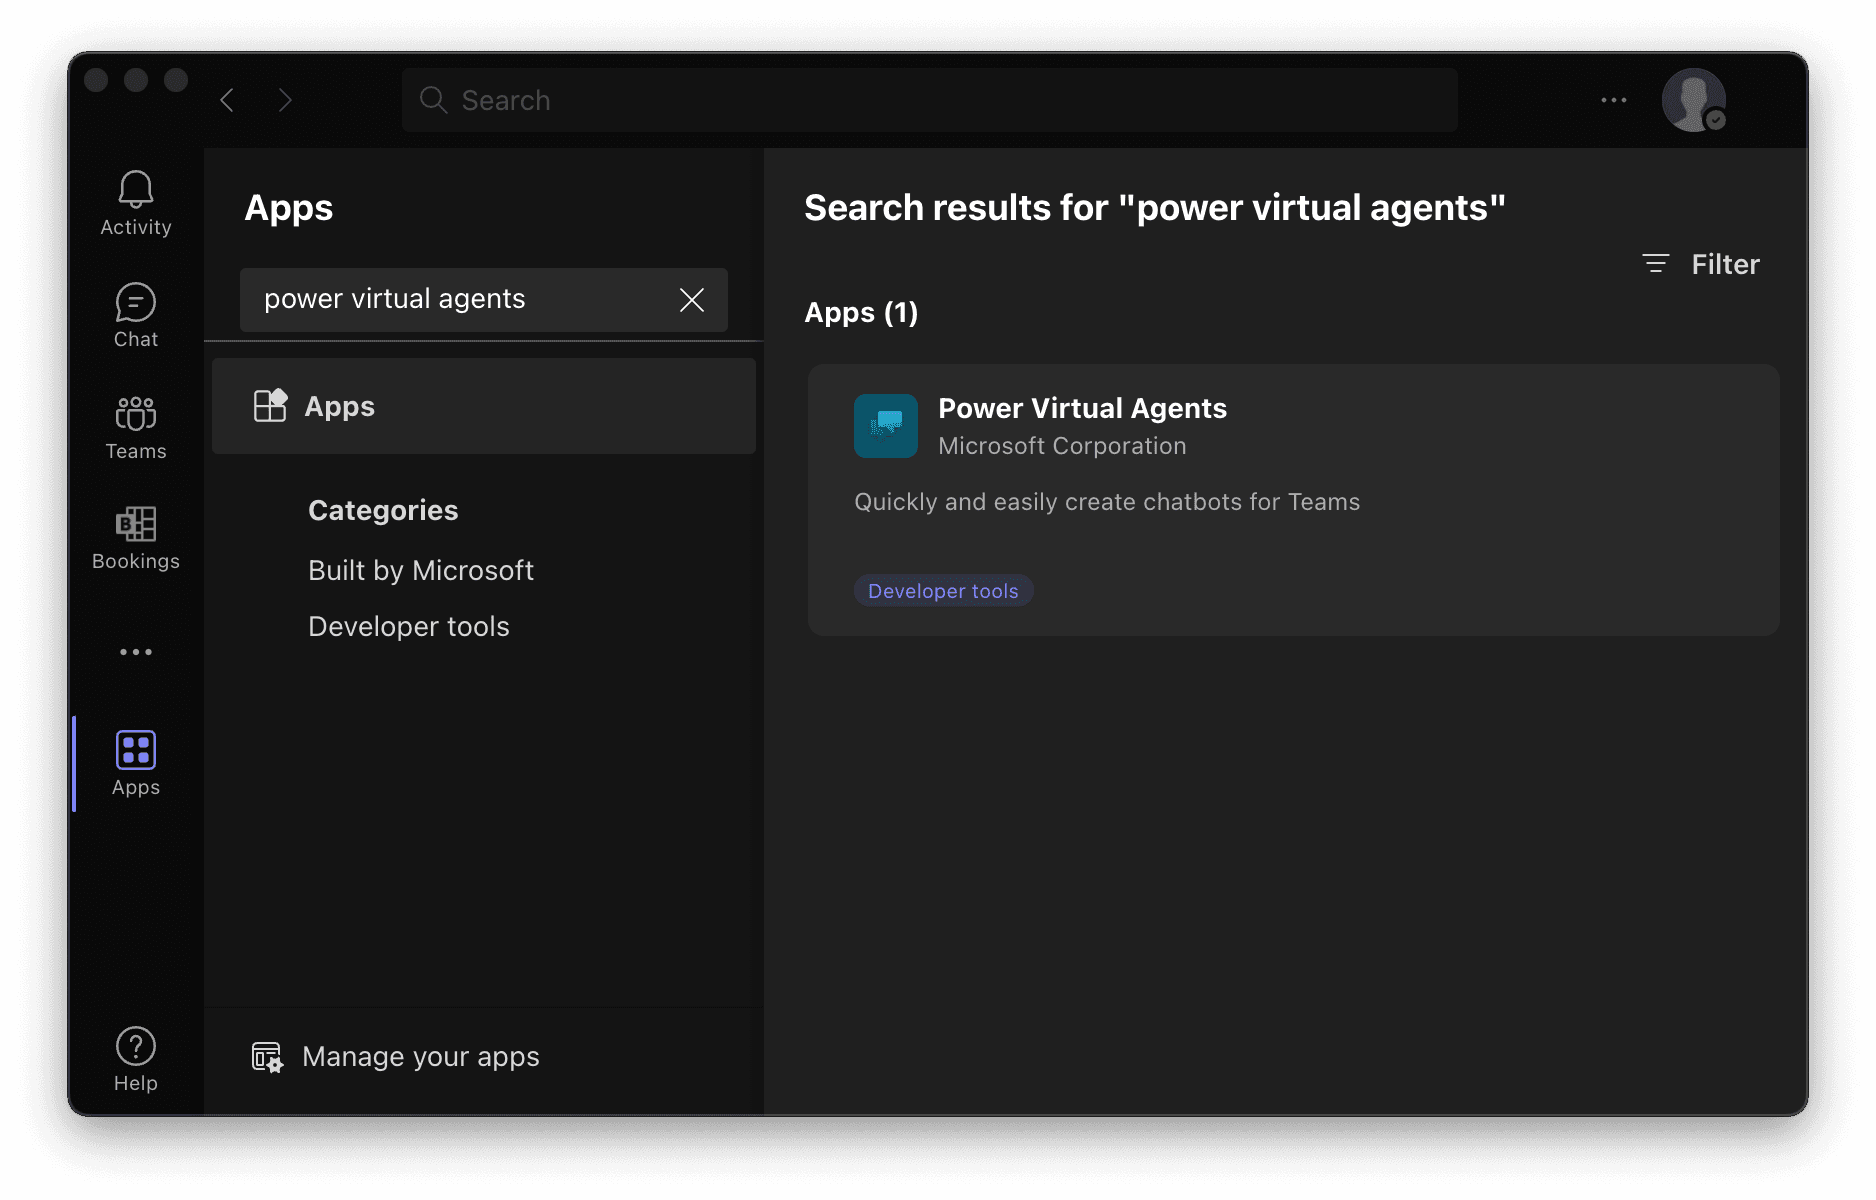
From within your Teams environment, click the Apps button in the side navigation menu and search for "Power Virtual Agents".
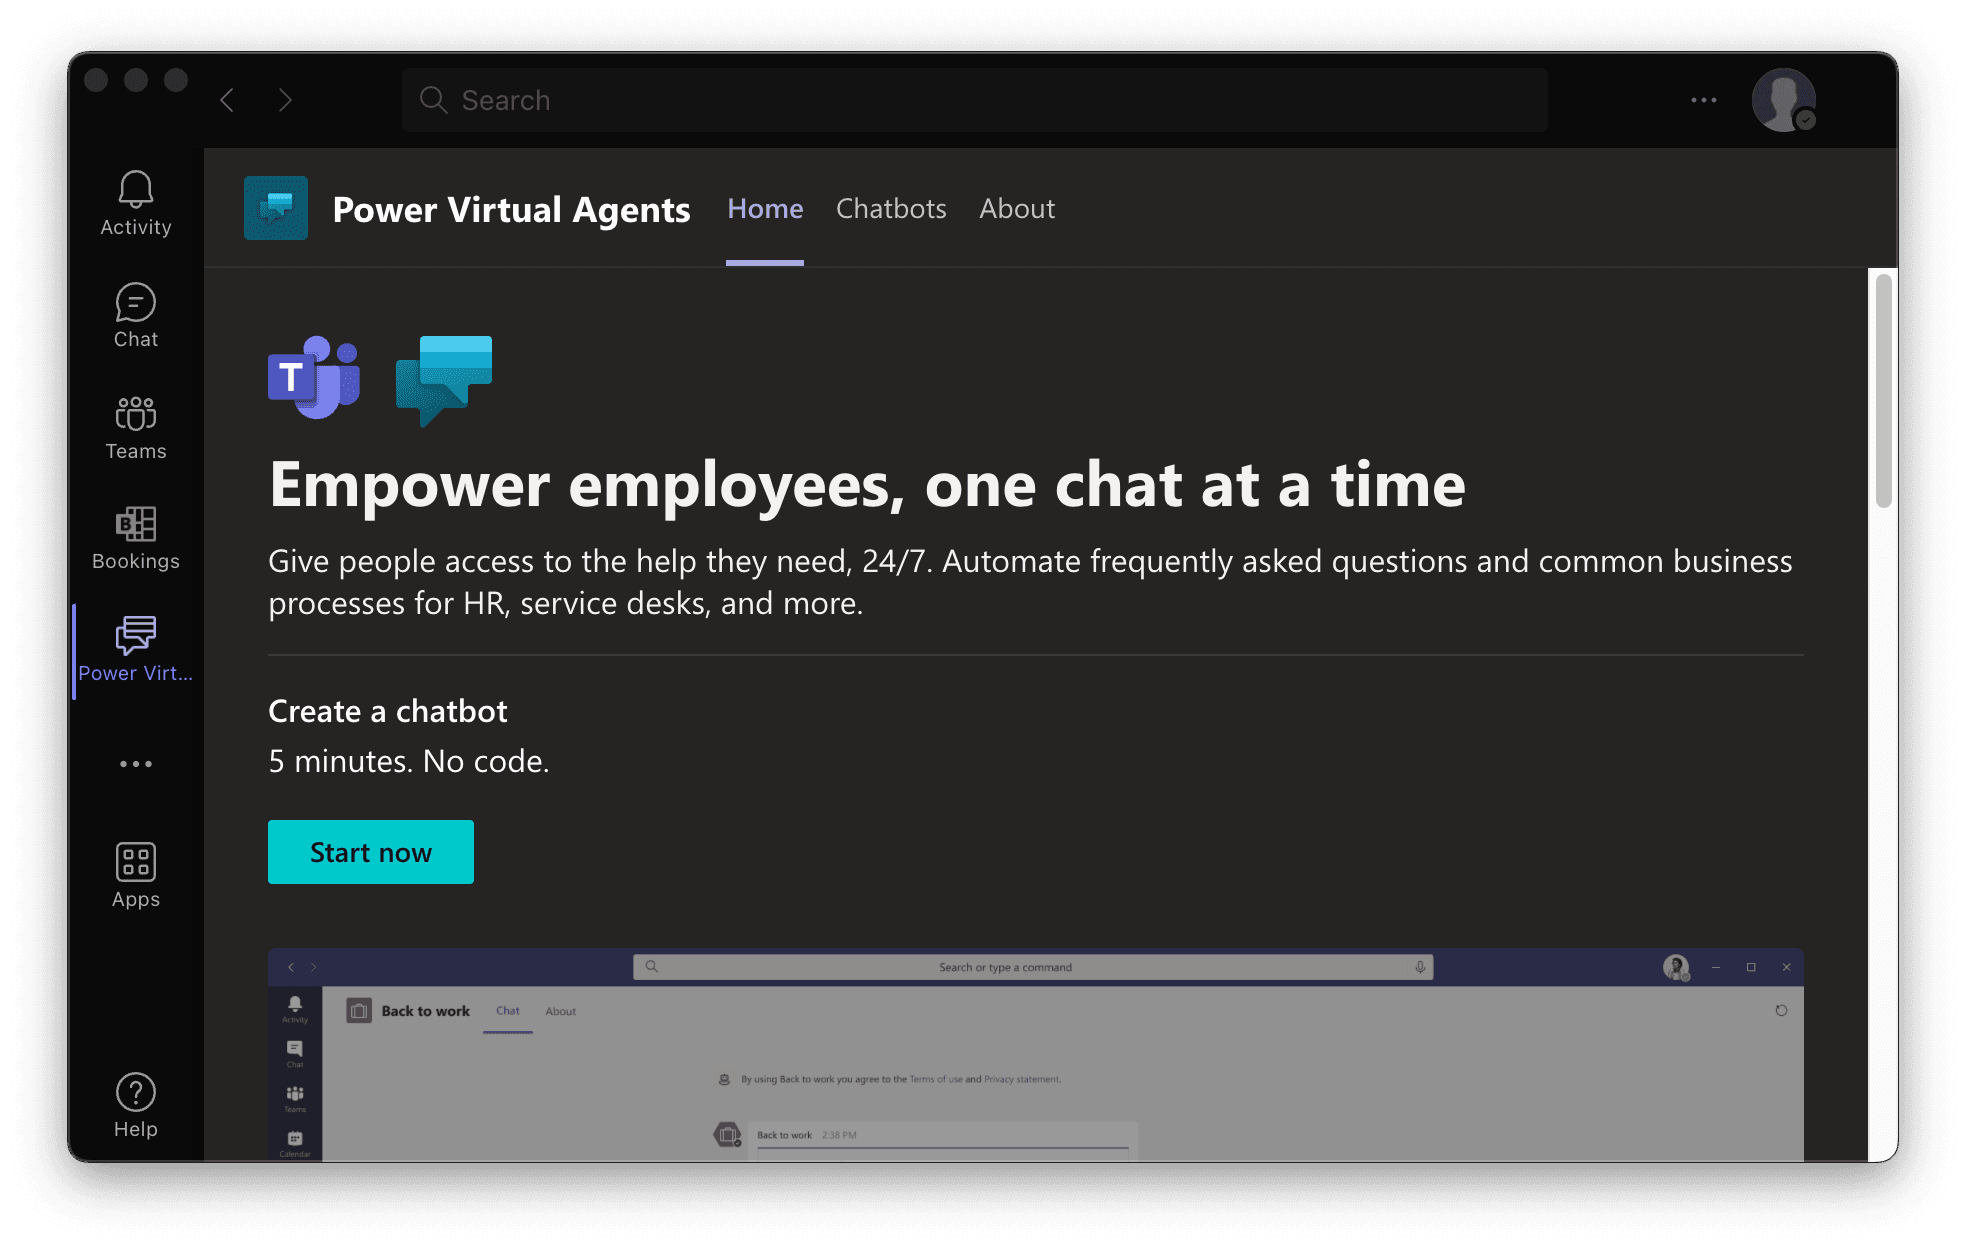
If this is your first time using it, you'll be prompted to add it to your organization's environment. Once you've done that, click Open to access the tool. Once it's open, click Start now to make a new chatbot, and select the appropriate team you want to have access to it.
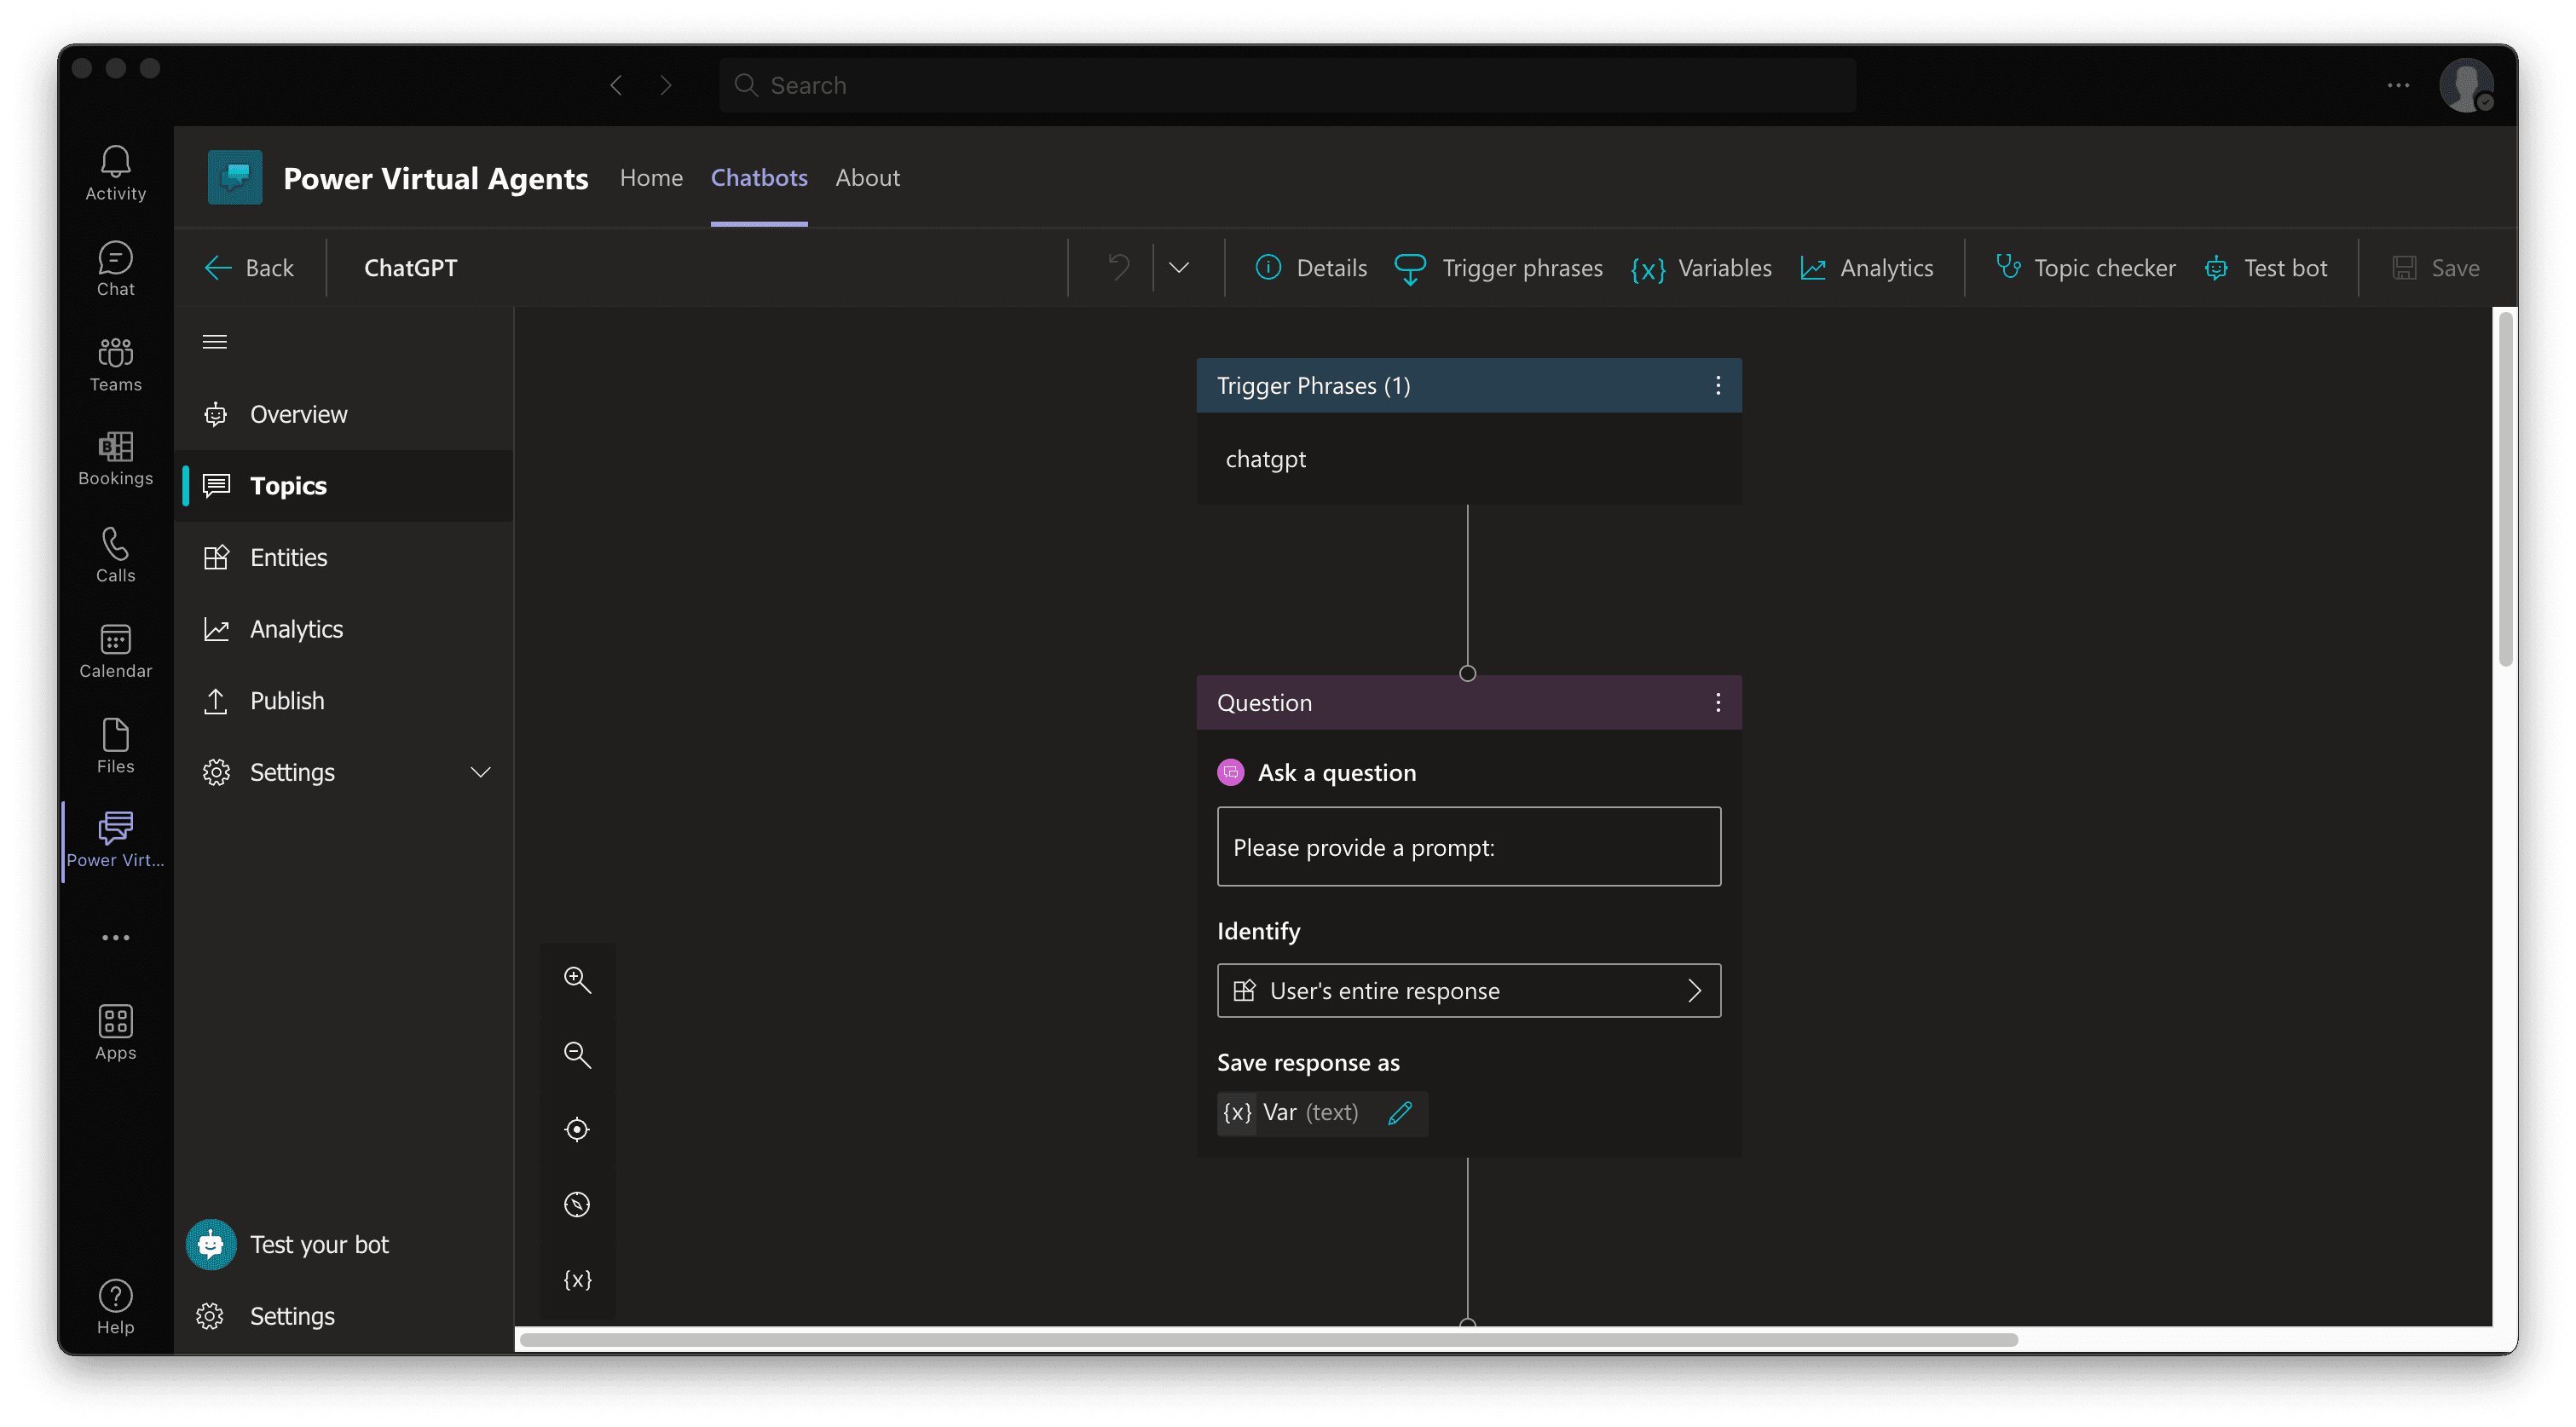
From there, click into Topics on the left. You can switch the status of the default topics to off and use the New topic dropdown at the top to make a new topic from scratch. Once you have a fresh topic opened up, you'll do the following:
- Adding some trigger phrases that you'll use to call the functionality of the chatbot - in our case we just used "chatgpt" to keep it simple.
- Add an "Ask a question" node. Prompt the user with a question, Identify the User's entire response, and save the user's entire response to a text variable that will be used as an input to our Power Automate flow.
Creating the Power Automate Flow
Next, we'll create a node to "Call an action" and "Create a flow". I've already created the API request flow, so I'll skip ahead and explain how it works.
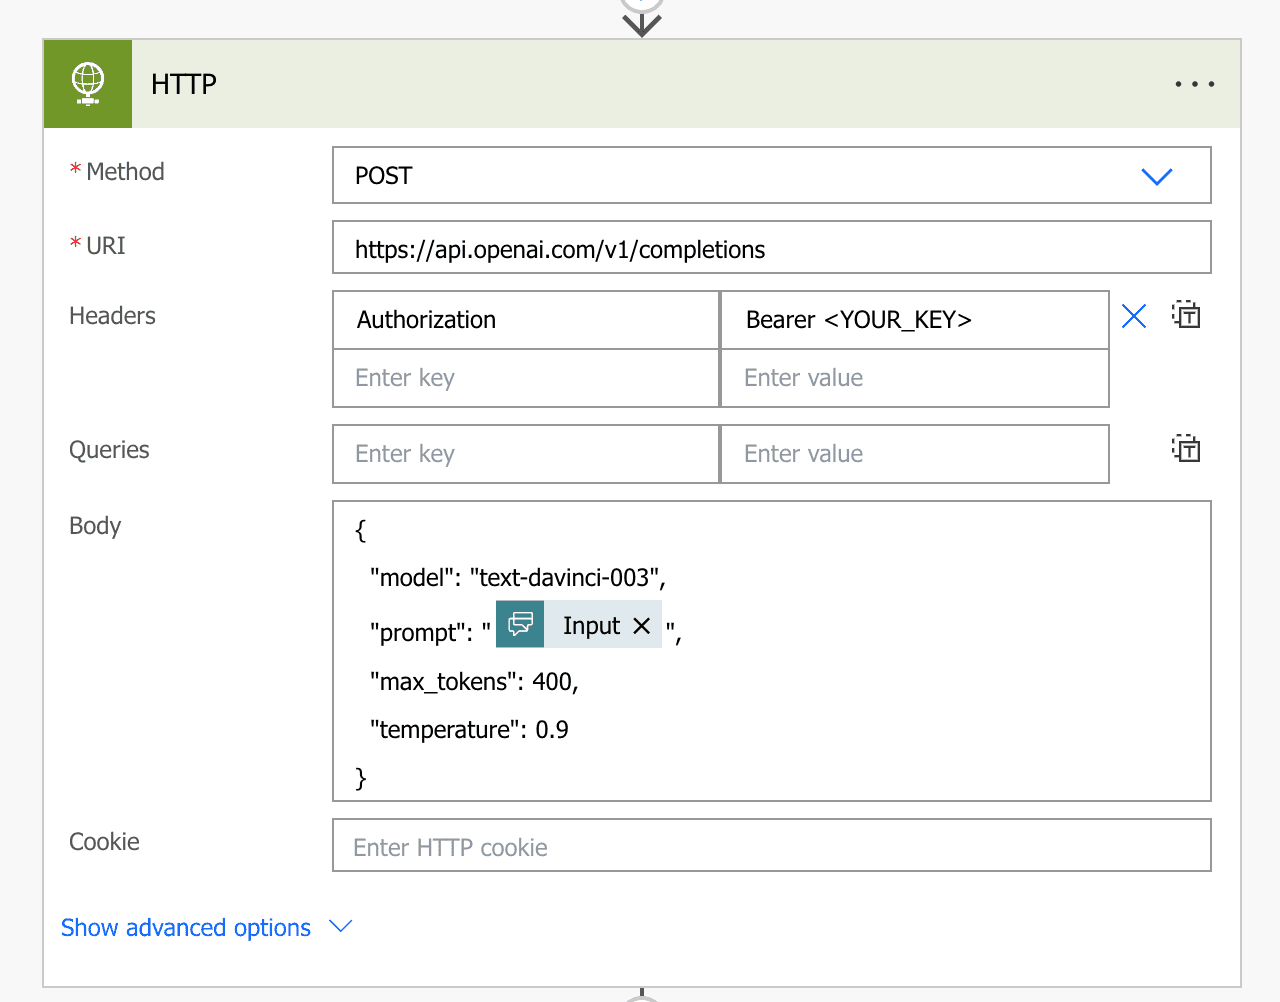
First, using the input from the virtual agent, we'll make an HTTP request to the API at the completions endpoint. Since it's a POST request, we'll have to pass in a request body:
{
  "model": "text-davinci-003",
  "prompt": "@{triggerBody()['text']}",
  "max_tokens": 400,
  "temperature": 0.9
}
In this example, we're using the davinci model, prompting using the input from the user, using no more than 400 tokens per request (this number can be increased to 4096[^4]), and a temperature of 0.9 to provide a more verbose response (more randomized as per the docs). In the headers that are passed, be sure to replace < YOUR_KEY > with the secret key you just generated from OpenAI.
Next, you'll have to parse the JSON response that you receive from the API, using a built-in "Parse JSON" step. I'll save you the hassle of generating the schema:
{
  "type": "object",
  "properties": {
    "id": {
      "type": "string"
    },
    "object": {
      "type": "string"
    },
    "created": {
      "type": "integer"
    },
    "model": {
      "type": "string"
    },
    "choices": {
      "type": "array",
      "items": {
        "type": "object",
        "properties": {
          "text": {
            "type": "string"
          },
          "index": {
            "type": "integer"
          },
          "logprobs": {},
          "finish_reason": {
            "type": "string"
          }
        },
        "required": ["text", "index", "logprobs", "finish_reason"]
      }
    },
    "usage": {
      "type": "object",
      "properties": {
        "prompt_tokens": {
          "type": "integer"
        },
        "completion_tokens": {
          "type": "integer"
        },
        "total_tokens": {
          "type": "integer"
        }
      }
    }
  }
}
Follow that up with a built in "Compose" step, utilizing the following as a "Expression" to access the first element of the "choices" array generated by the API:
body('Parse_JSON')?['choices']?[0]['text']

Finally, send the output of the output step of the flow to the virtual agent and share that with the user in the "Message" node.
Publishing the Virtual Agent
You can use the "Test bot" functionality at the top to ensure that your API request is being routed correctly and providing you with a proper output. As long as everything looks good, you're ready to publish your bot for use by the rest of your team! Here's how:
- Click "Save" at the top to ensure all your changes are included.
- Click "Publish" in the left side menu, and then the "Publish" button. Once your bot has been published, you should get a confirmation message like the one below.
- If you need to, use the "Make the bot available to others" button and follow the prompts.

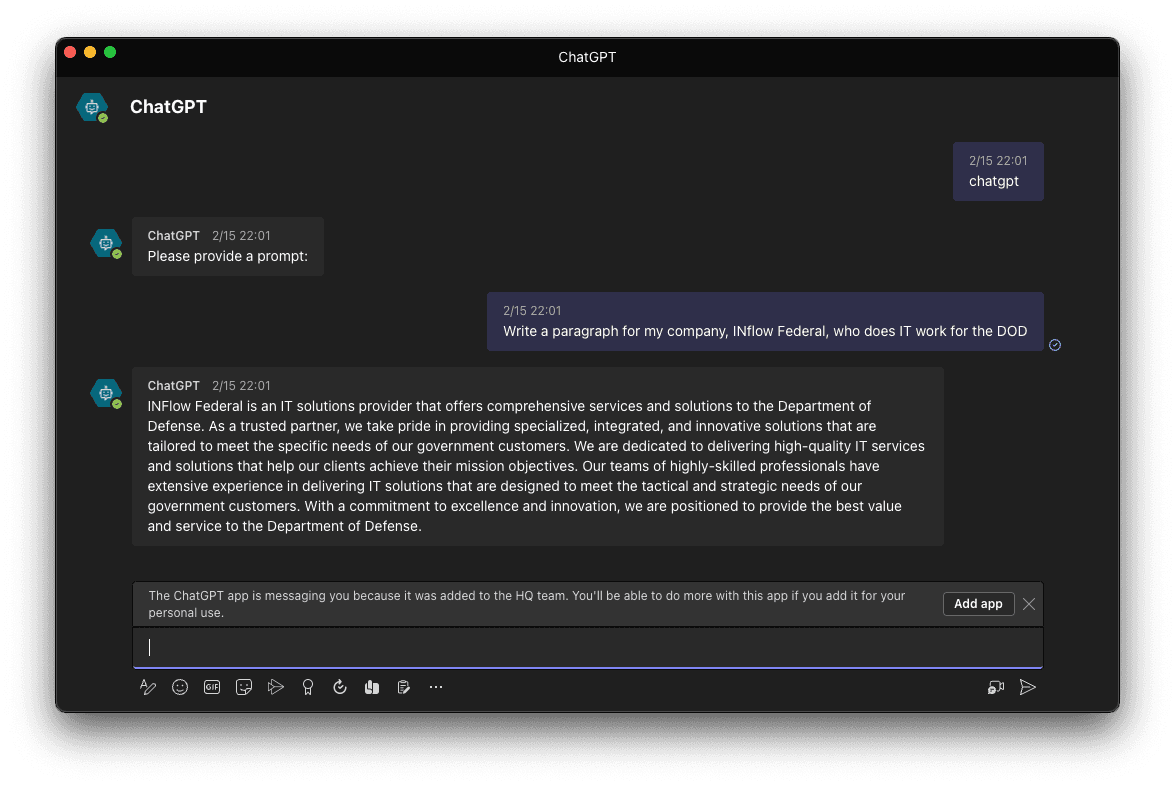
Usage
Congrats on deploying your ChatGPT powered Virtual Agent! Just prompt by sending "chatgpt" and it can now be used to generate text:
Any questions? Feel free to contact us and ask away.